Performing file/folder restoration

Prerequisites

Things needed to perform a successful data restore:

  • CyberSecure Advanced edition is installed on the computer to restore back to.
  • The backup encryption password. Without this, the data will be unreadable.
    The password can be retrieved from a working installation by following this article.
  • A functioning internet connection to download data over (if recovering from the online servers).

Process for restoring files

Login and start the restore wizard

  1. Open the CyberSecure Advanced software
  2. PLEASE READ THIS STEP
    Login using your account login name and password
    If prompted to setup a trial registration, make sure you choose “Already a user”:
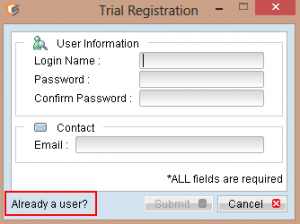
    Then continue to enter your account login name + password. If you do not know the password, please see this article the two types of differing passwords.
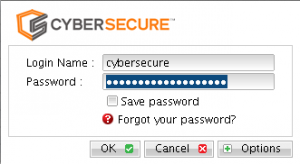
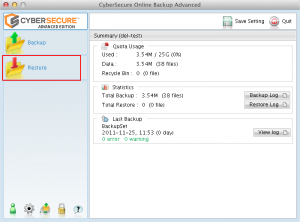
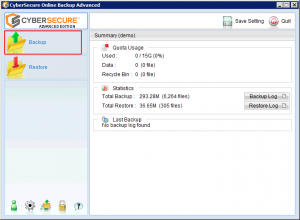
  3. In the main screen, click [Restore]

Select the data to restore

  1. Select the backup set you wish to restore from and click next
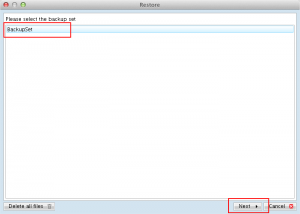
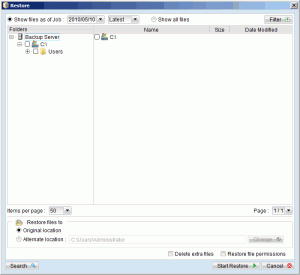
  2. The restore screen will be displayed
  3. Using the drop-down selection boxes, choose the date and time from which you wish to recover your files from.
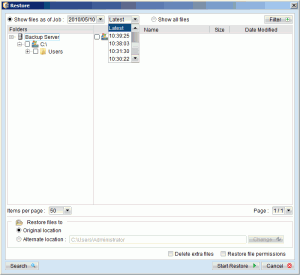
  4. Select the files and/or folders to recover. Entire folder hierarchies can be restored in this manner. Note also the “Restore files to” option, which allows the recovery of files to the original or an alternate location.
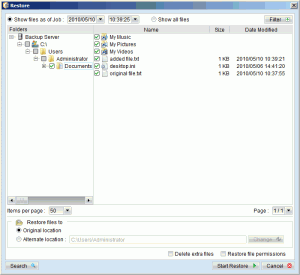
  5. Click “Start Restore” to begin the restoration process.
  6. The restore will download and decrypt the necessary data from CyberSecure’s backup servers. The following dialog screen will be displayed after a successful recovery:
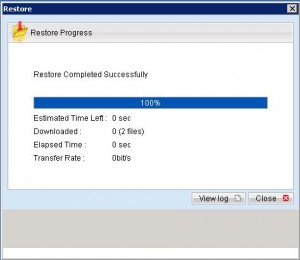
  7. The files will have been restored into your desired location – please now check via windows explorer or the mac finder.
Posted in File backup: Server: issues with restore | Tagged , , , , , , , | Leave a comment

Stop a running backup

On Mac OS X

  1. Please open a terminal window
  2. Enter the following command:
    Example:
    touch ~/.obm/ipc/BackupSet/Backup_ID/stop

Windows

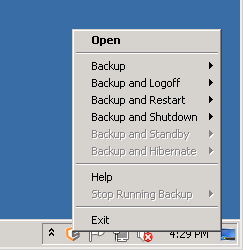
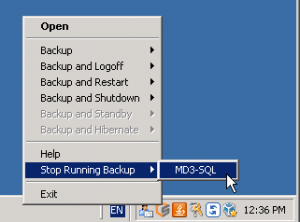
  1. Right-click the CyberSecure icon in the system tray
  2. Hover over [Stop running backup] and click the appropriate backup set
  3. If no backups are running, this menu item will be grayed out

Fixing stale backups

It’s also possible that the backup has gone stale, in which case the backup queue will need to be cleared in order to fix.

Posted in File backup: Desktop, File backup: Server | Tagged , , | Leave a comment

Forgotten password

If you have forgotten your password but still have access to a computer where CyberSecure is installed, you can retrieve the stored password from the client software. This is the recommended method of retrieving the password if it’s forgotten or unknown.

If the account was setup on a separate computer and the hard drive contents can still be accessed, simply retrieve the “config.sys” file from the “C:\%USERPROFILE%\.obm\config” folder and copy onto the new machine. This file contains the cached encryption and account passwords.

Process for recovering the encryption password from an existing ADVANCED edition installation

  1. Open CyberSecure Advanced by right-clicking the system tray icon and choosing “Open”
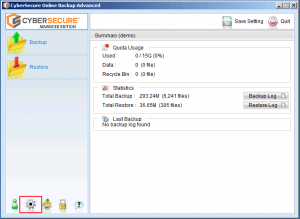
  2. Open the Backup Settings by clicking the “Cog” icon
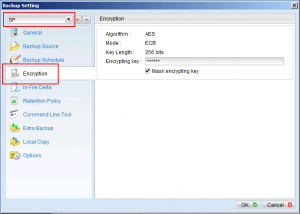
  3. Select the desired backup set, then choose “Encryption settings”
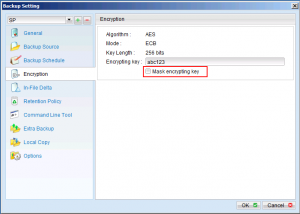
  4. On the right-hand side, uncheck “Mask Password”
  5. You will now be able to view the ENCRYPTION password for that backup set.
    Note that each backup set could potentially have a different encryption password, so it’s a good idea to check each backup set.

Troubleshooting

  • If you receive the “Trial registration” screen when opening the software, it’s because you are using a different local user account than was originally setup under.
Posted in File backup: Server | Tagged , , | Leave a comment

Recovering an Exchange 2010 server

Restoring to a live Exchange 2010 server

  1. Open CyberSecure Advanced
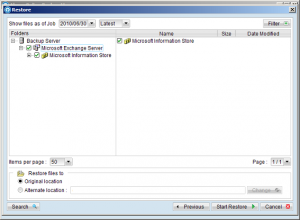
  2. Click “Restore”, the following screen appears:
  3. Select the desired snapshot to recover
  4. Click “Start Restore”
  5. CyberSecure Advanced will handle the downloading, decryption, dismounting and re-mounting of the Exchange server store.
Posted in File backup: Server: issues with restore | Tagged | Leave a comment

Microsoft SQL Server backup setup & best practices

Creation of MS-SQL server backup set

Prerequisites

  • CyberSecure Advanced installed
  • SQL server 2005 and above
  • SQL management studio

Pre-flight checklist

To configure an MS-SQL backup set according to best practices:

  1. Open CyberSecure Advanced by right-clicking the system tray icon
  2. Open the settings by clicking the “cog” icon
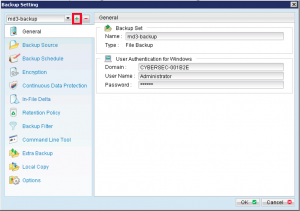
  3. Add a new backup set by clicking the “plus” icon
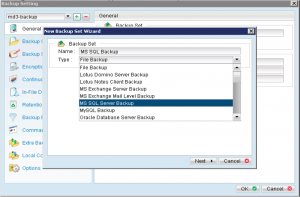
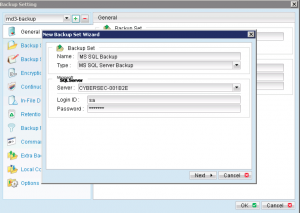
  4. Type a name for the backup set, select “MS-SQL Server Backup” from the drop-down list then click next
  5. The login ID and password of the SQL Server will be pre-populated to the system administrator “sa” user. Please change if you’d like to use an alternative SQL user account (use only SQL authentication here, not Windows Authentication).
  6. Select the Databases needing to be backed up – IMPORTANT: selecting the top-level server will mean all current & future databases will be captured.
  7. The next window will allow you to setup the schedule and backup types for the MS SQL Backup.
    1. The recommended backup strategy is to have only a database backup (no transaction log backup) – this keeps things simple and ensures a complete backup each time. If you have a requirement for a transaction log backup, please keep following this article, then add in the transaction log backup schedule.
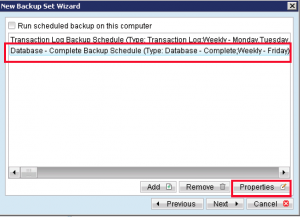
  8. In the schedule settings, click on the transaction log schedule and REMOVE it. If your database is very large, or you have a specific requirement to backup transaction logs, see this article for information on performing transaction log backups.
  9. Now click on the “Database-Complete” -> Properties to set the schedule for the database backup.
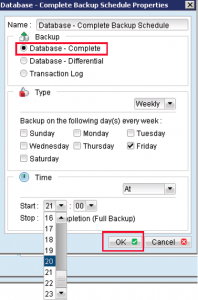
  10. Choose your desired schedule, ensuring that “Database – Complete” has been selected. We recommend performing a daily backup.
  11. Click OK and return to the schedule screen of the wizard
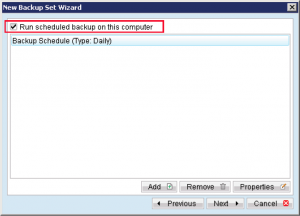
  12. If data seeding is NOT REQUIRED, then leave “Run scheduled backup on this computer” TICKED so that the automatic schedule will run and backup data automatically.
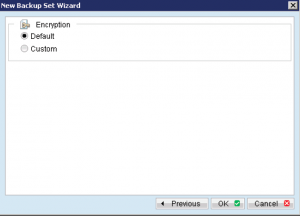
  13. Continue on to the next screen. Leave the encryption settings to Default and click OK.
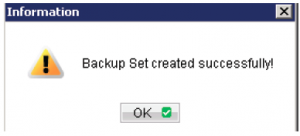
  14. The backup set wizard will complete.
  15. There are just some additional best practices settings that need to be set.
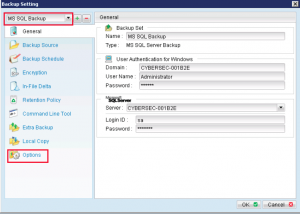
  16. Once back in the main settings scree, ensure that the MS-SQL server backup set has been selected, then click “Options” in the left-hand pane.
  17. Select “In-File Delta” and use the following settings
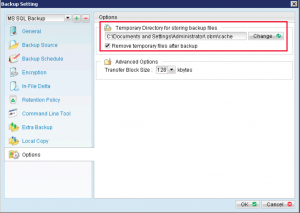
  18. The SQL server backup will spool out to a temporary folder before backing up offsite. It is critical that this folder has the following attributes in order for the backup to function correctly:
    1. Enough free space to hold the entire SQL database
    2. Unrestricted permissions on the folder for the SQL server to spool out data
    3. It is highly recommended to create a dedicated D:\CyberSecure-spool folder away from your main OS disk
    4. Network drives can be used, however there will be security considerations if the network device requires authentication to a domain.
    5. If Cybersecure-spool is being set to a network location, ALWAYS use UNC pathnames (e.g. \\srv01\backup\Cybersecure-spool) instead of a mapped drive letter. The reason is that windows mapped drives exist only within the session in which they were created, so when the user logs out of the system, the mapped drive will disappear.
  19. Clicking “Change” will allow the temporary spooling location to be changed to a folder that is suitable for your environment.
  20. Click OK and return to the main screen
  21. Always save settings to the offsite servers after completing any reconfiguration
Posted in MS-SQL Backup | Tagged , , | Leave a comment

Creating a file backup set

  1. Install CyberSecure Advanced Edition
  2. Open the software, ensuring that you allow any requests through your firewall software
  3. If this is the first time you’ve run the software, you may be prompted for a Trial Registration. To register for a trial, enter your details, or if you already have an account, login using your account credentials.
  4. If there have been no backup sets previously setup, the “Add new backup set” wizard will appear to guide you through the creation of a backup set. By default, the backup set type is automatically set to “File Backup”, which is designed for the capture of normal files & folders.
  5. The next screen presents the “source data” selection – this is where the desired files & folders to be included in the backup are chosen.
    1. If you are wanting full control over which files are backed up, we recommend unticking my documents, then choosing [Advanced], which provides a complete tree-view listing of location on the computer.
    1. The advanced file selection screen allows you to drill-down to the exact data you want to backup. It also allows you to backup from a network drive or UNC path. Please see our best practices for backing up NAS or network shares.
  6. Choose the backup schedule for this backup set. We recommend to keep the schedule interval small to minimise the amount of data sent between backups.
  7. The next screen allows you to change encryption settings. Only do this if you know what you are doing!
    1. Leaving the default settings means that your current login password is the password that encrypts your data. It is absolutely critical that this password is remembered – any recovery operation will require your password.
  8. Choose OK and you are done setting up the file backup set.
  9. Back at the main screen, it’s a good idea to [Save Settings] to the server. From here, there are several options you may want to check and review, the main options being listed below. Please take the time to get familiar with these, as they could make the difference between successful and failed backups!

Common questions and solutions

  • Where are the local settings/profile stored?

    These locations can be deleted to flush the local settings cache from the system.
    Your settings will still be stored on the remote CyberSecure servers, however any locally cached settings will be purged. Once deleted, you will be prompted to enter the username/password details upon loading the software.

    Platform Location
    Windows C:\Users\%user%\.obm
    Mac OS X /Users/%user%/.obm
  • What are some of the settings I can change?

    General Settings

    Sets the backup set label and domain authentication details for network mounted shares.

    Setting Description
    Backup set name The label for the backup set
    Type The backup set type. It is important that you select the backup type that is designed for the data you are backing up.
    Windows Authentication: Domain The windows domain of the network, for the software to run with these user privileges.
    User name The user to authenticate against the domain.
    Password The users domain password.

    Retention policy options

    Configures how the backup sets are retained on the offsite CyberSecure servers. Two settings are available: simple & advanced.

    Simple is defined by a set number of days or jobs. Advanced allows a much more flexible retention scheme, which can be used to meet business regulations or compliance obligations.

    Setting Description
    Keep deleted file(s) for X days/jobs Retains deleted or changed files for the specified amount of days or jobs. This is the most simple retention policy available.

    Command line tool options

    This screen allows the setting of programs to run before/after the backup process runs. Uses of this include, for example, if your application needed to extract a ZIP file to backup the data inside the archive, rather than backing up the ZIP file itself.

    Setting Description
    Pre-backup Program to run before the backup starts
    Post-backup Program to run after the backup finishes

    Backup filter options

    Backup filters allow you to exclude certain types of files from the backup. For example, you might want to exclude video and/or music files from being backed up (*.avi & *.mp3)

    Setting Description
    Name Label for the particular backup filter

    Backup Options

    Advanced options for configuring the backup, most critically where the temporary cache directory is stored.

    Setting Description
    Temporary directory for storing backup files Location for storing backup cache data. For maximum performance, this location should be stored on a separate disk.
    Volume shadow copy Enables VSS to allow the backup of open/locked files on Windows 2003 and above.NOTE: this is for file-based backups ONLY. Do not use this to backup exchange or SQL server, instead use the dedicated modules for these applications.
    Transfer block size The network block size for offsite transfers. Leaving the defaults are highly recommended.
    Backup file permissions Enables the backup of file permissions and ACL’s. NOTE: this may substantially increase the size of the backup as a change in permissions requires the storage of the entire file.
Posted in File backup: Server: issues with backup | Tagged , | Leave a comment

How to perform backup seeding

  1. To begin the seeding process, first install CyberSecure online backup. The latest versions of CyberSecure can be downloaded from our support site.
  2. Open CyberSecure by right-clicking the system tray icon and choosing “Open”
  3. Create your backup set(s) by following this guide
  4. Open the backup settings, go into “Backup Schedule” and ensure that your backup schedules have been deactivated by removing all the scheduled jobs. This will prevent your backups from automatically running before the drive has arrived to our engineers.
    1. Open the “Backup Settings”
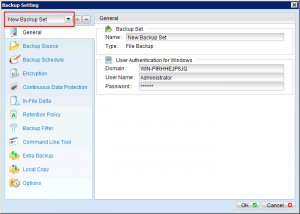
    2. Select the backup set using the drop-down selection box
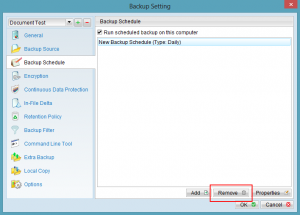
    3. Navigate to the “Backup Schedule” settings and “REMOVE” all schedules associated with the backup set – this will ensure that the backup does not upload automatically.
    4. Confirm the removal
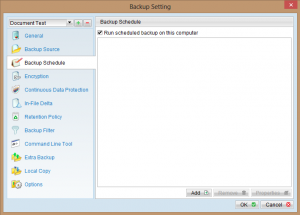
    5. The schedules screen should now look like this
    6. Click OK to get back to the main console
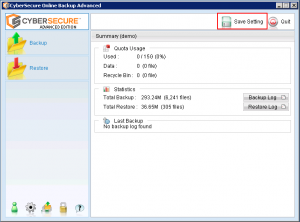
  5. After making any settings change, always “Save Settings” back to the CyberSecure servers
  6. In the Main console, click “Backup”
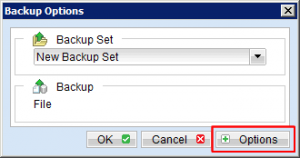
  7. Choose “Options” – this displays available backup options.
    Note: the desired backup set can be specified using the drop-down box. Each backup set needs to be seeded individually.
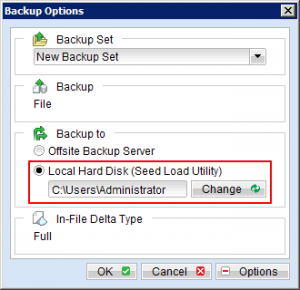
  8. Select “Local Hard Disk (Seed Load Utility)” for a destination
  9. Select the path to the removable hard disk (eg. F:\)
    IMPORTANT: Don’t create individual folders for each backup set, simply choose the ROOT LEVEL of the drive and perform the seed for each backup set. The software will preserve what has already been seeded on the drive.
  10. For Exchange Backup Set, please choose “Full Backup”.
  11. Click OK and the backup will seed to the local hard disk
  12. Once finished, click close
  13. Repeat this process for all backup sets
  14. When all backup sets have been seed loaded, note the size of seeded data on the drive – it should line up with the expected total data size (it will be less due to compression).
  15. When satisfied with the seeded size, unplug the hard disk and return to CyberSecure. Our team will notify you when your account has been successfully setup and you can re-enable the backup schedules as detailed earlier.
  16. For technical support, please email service@cybersecure.com.au or phone the CyberSecure helpdesk on 1300 854 292
Posted in File backup: Server | Tagged , , , , | Leave a comment