Exchange 2003/2007 restore process
Prerequisites
- Ensure that Windows, Exchange and AD have been restored back (at the same service pack and patch level) to the target machine.
Restore process
- Restore the Exchange backup via the CyberSecure software agent to a temporary location for the purposes of this guide: “E:\Backup”.
- Open CyberSecure
- Click “Restore”
- Choose the desired backup snapshot
- Restore back to a local location, eg “E:\Backup”
- Once the restore process is complete, run the “ExchangeRestore” command for your appropriate platform using the following parameters:
- DIR = Location of the restored backup files from CyberSecure Advanced.
- TEMP = Temporary location for the restore process to do work. This should be fast and have plenty of free space.
- SERVER = Name of the server to restore Exchange back to.
- For 32-bit platforms:
C:\Program Files\CyberSecure Advanced\bin\ExchangeRestore DIR=”e:\backup” TEMP=”e:\temp” SERVER=”Win2k3″
- For 64-bit platforms:
C:\Program Files\CyberSecure Advanced\bin\ExchangeRestore64 DIR=”e:\backup” TEMP=”e:\temp” SERVER=”Win2k8″
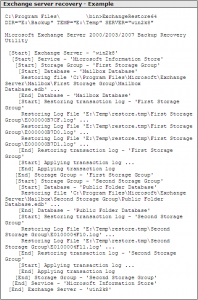
- Here is an example of running the ExchangeRestore64 utility:
- Mount the Exchange database afterward in System Manager for Exchange 2003 or Exchange Management Console for Exchange 2007.
- Repeat the same procedure for each database to be restored. Verify under the Event Viewer if there is any error generated during the restore process. If the restore process failed with errors such as bad signature, or null error, the backed up database file restored may be incorrect.
How to check backup reports/log files
How to check backup reports through the backup agent
Checking backup reports through the client agent provides more detail than through the web console and may be useful to diagnose a more complex issue.
- Open the CyberSecure backup agent
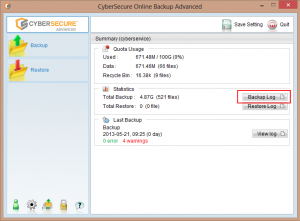
- In the main screen, click “Backup Log”
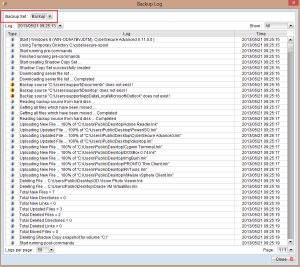
- In the backup log main screen, select the backup set
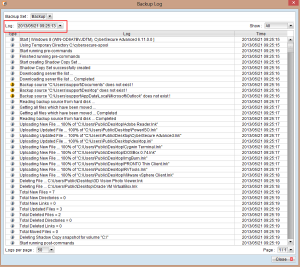
- Then select the backup job via the drop-down box
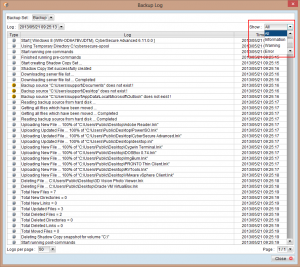
- Also useful is the ability to filter by the event type – info, warnings or errors
How to check backup reports online via the web console
Using the web console is a good way to check multiple backup sets from a central location.
- Login to the CyberSecure web console via the web interface
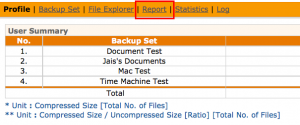
- Once logged in, click on “Report” in the top-level menu
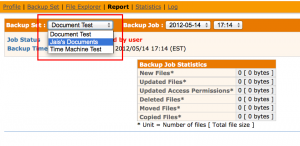
- Select the respective backup set from the drop-down box
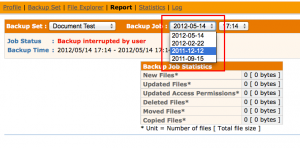
- Select the backup job date
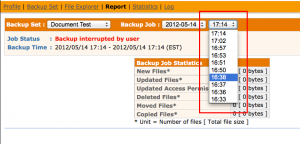
- Select the time of the backup job
- A basic overview will be displayed
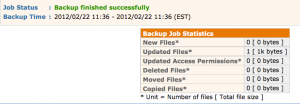
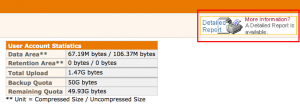
- Clicking into “Detailed report” on the far-right will bring up a complete detailed log of the backup session, including added, updated, deleted and moved files + data.
Change backup source selections
- Open CyberSecure standard edition
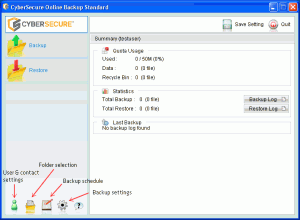
- In the main screen, click the “Folder selection” icon:
- Some common locations will be displayed.
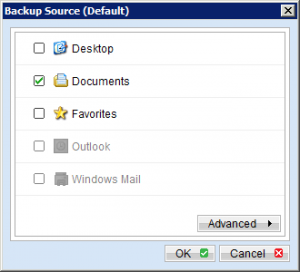
Choosing “Advanced” will allow the selection of other locations on the computer
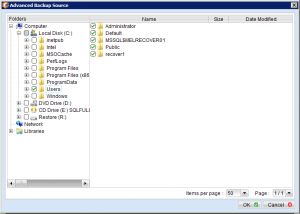
- When done, choose “OK” and proceed back to the main screen
- Save settings to the servers
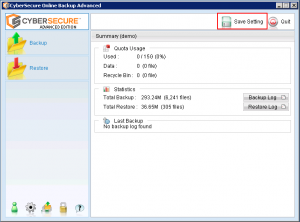
- Your backup will now be reconfigured to capture the new locations
Physical restore
Prerequisites
- USB drive with encrypted backup data from CyberSecure
- A suitable windows computer with CyberSecure Standard edition installed
- A location for the decrypted/restored data
Process for performing a physical restore
- As an administrator user, or by elevating privileges with Windows UAC, edit the file “Decrypt.bat” under the /bin folder in the installation path
- Change the following lines for your environment:
- SET ID_DIR – point this to your source USB backup set location
eg:
SET ID_DIR=”E:\Seedload\backup-01.cybersecure.com.au\test\files\12388324″ - SET DECRYPT_TO – set this to your restore destination
eg:
SET DECRYPT_TO=”C:\restored” this must be a subfolder, eg “F:\restore” - SET DECRYPT_KEY – enter the encryption password
eg:
SET DECRYPT_KEY=”myPassword” - SET POINT_IN_TIME – set point in time you want to restore. Put “Current” for latest available
eg:
SET POINT_IN_TIME=”2015-09-01-19-30-00″
- SET ID_DIR – point this to your source USB backup set location
- In a cmd.exe shell (with administrator privileges), run “decrypt.bat”
- The decryption + restoration process will proceed
[Microsoft][ODBC SQL Server Driver][SQL Server]Write on “XXXX” failed: 665(failed to retrieve text for this error. Reason: 15105)
Error
[Microsoft][ODBC SQL Server Driver][SQL Server]Write on “XXXX” failed: 665(failed to retrieve text for this error. Reason: 15105)
Cause
We’ve found this is caused by a heavily fragmented filesystem on the volume where the spooling folder is located.
Resolution
- Run a Windows defrag operation on the volume where the spooling folder is located.
- Alternatively, pick a different, less fragmented volume to spool the database to.
References
The backup of full-text catalog XXXX is not permitted
Error
[Microsoft][ODBC SQL Server Driver][SQL Server]The backup of full-text catalog ‘FTCatalog’ is not permitted because it is not online. Check errorlog file for the reason that full-text catalog became offline and bring it online. Or BACKUP can be performed by using the FILEGROUP or FILE clauses to restrict the selection to include only online data.
Cause
This behavior occurs because a full-text catalog in the database is not online. To perform a full backup, SQL Server requires all the database files and full-text catalogs in the database to be online.
Resolution
CExBackup::backupFile:HrESEBackupReadFile: Error Number 0xc7ff1004: (null)
Error
CExBackup::backupFile:HrESEBackupReadFile: Error Number 0xc7ff1004: (null)
Cause
This is typically caused by a corrupted exchange store due to a hardware fault. Can be confirmed by checking the event log under the backup source “ESE”.
Resolution
- Check the event viewer to confirm the hardware issues.
- Ensure that the hardware is fault-free.
- Perform an exchange integrity check + repair
- Exchange 2003 (Microsoft KB article)
- Exchange 2007 (Microsoft KB article)
- Exchange 2010 SP1 (Microsoft technet article)
- Be advised that specialist exchange recovery skills may be required to minimise loss of data.
MAPI_E_UNCONFIGURED
Error
MAPI_E_UNCONFIGURED whilst trying to setup a mail level backup.
Cause
Currently being investigated
Resolution
Currently being investigated
