ERROR=MAPI_E_CALL_FAILED Detail=Unspecified error

Error

The following warning is shown in the detailed log when attempting an MS Exchange mail-level backup:

[BackupRequestTask._uploadFiles] Unexpected Exception: [Error] CExMAPI::SaveToMessage::SaveToMSG ERROR=MAPI_E_CALL_FAILED Detail=Unspecified error

Cause

This error appears to be caused by a bug in releases < 6.13.2.0.

Resolution

Update the backup agent to the latest release by performing an in-place install over the existing software.

Posted in File backup: Server: general issues | Leave a comment

[BackupSetCmd.uploadBackupFiles][java.io.IOException] Error=The handle is invalid.

Error:

[BackupSetCmd.uploadBackupFiles][java.io.IOException] Error=The
handle is invalid.

Cause:

Not found yet but could be the NAS connection instability.

Resolution:

Run a manual backup and next time, the backup should be fine.

Posted in Uncategorized | Leave a comment

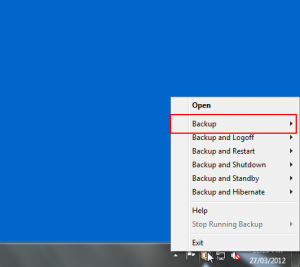
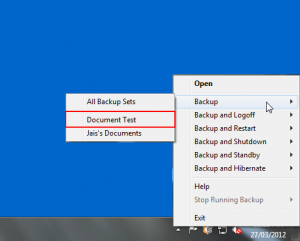
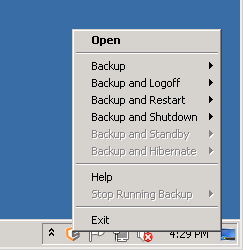
How to run a manual backup via the system tray

Windows:

  1. Right-click the CyberSecure system-tray icon – the menu will pop up
  2. Select “Backup”
  3. Then choose the set to manually backup, please be sure to only select the backup set that applies to that computer
Posted in File backup: Desktop: issues with backup, File backup: Server: issues with backup | Leave a comment

Fixing Sonicwall TCP timeouts

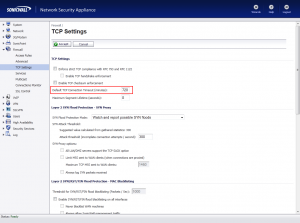
Sonicwall devices appear to ship with very aggressive TCP timeout settings – these can affect long-lived TCP transfers such as backups for CyberSecure.

To increase the TCP timeout setting:

  1. Login to your Sonicwall device
  2. Go to the top-level menu item “Firewall”
  3. Choose “TCP Settings”
  4. Change the “Default TCP Connection Timeout” from its default value of 15 minutes to 720 minutes (that’s 12 hours)
  5. You may need to restart the device for the changes to take effect

Further troubleshooting

If the above process does not resolve the issue, then a per-rule timeout change may be required.

  1. Create a new Firewall access rule
  2. Allow outgoing SFTP port 22 to 203.209.195.103
  3. Under the “Advanced” tab change the TCP timeout to something longer than the default 15 minutes (perhaps 720 minutes, 12 hours)
Posted in Uncategorized | Leave a comment

Removing a backup set from the offsite servers

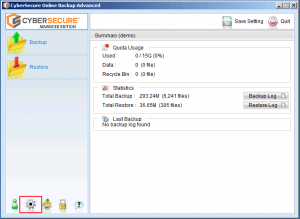
  1. Open CyberSecure Advanced
  2. Go into the settings
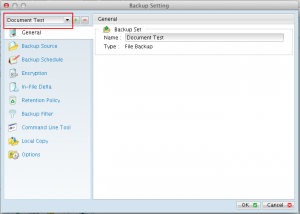
  3. Select the backup set you wish to remove from the servers
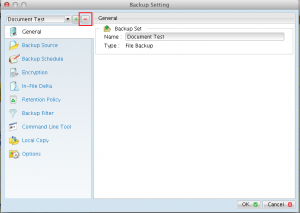
  4. Once the backup set has been selected, click the “minus” icon to remove the backup set from the servers. Important: this will permanently delete any data contained within the backup set from our servers.
  5. A confirmation screen will prompt you to remove the backup set
  6. Choose “yes” and go back to the main settings screen, choosing OK until back to the main console.
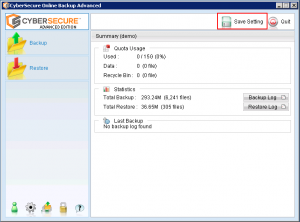
  7. Save your changes back to our servers to complete the removal of the backup set(s)
Posted in File backup: Server | Leave a comment

[java.lang.SecurityException] The system cannot find the path specified.

Error

[java.lang.SecurityException] The system cannot find the path specified.

Cause

The spooling folder is unavailable.

Resolution

Ensure that the spooling folder can be reached. If it is a network location, ensure that the “Windows Domain Authentication” details have been completed in the backup set configuration.

Posted in File backup: Server: general issues | Leave a comment

How to check the scheduler log file

Locate the correct scheduler log file

Find the active profile

  1. Find the location of the active user profile can be found in the “home.txt” file located under the application folder.
  2. Browse to the location of the active profile.

Examine the scheduler log file

Locate & open the debug .log file with a text editor (also check the last modified date, it should be modified < 5 minutes ago). This file is located under:

  • For Windows: C:\%USERPROFILE%\.obm\log\Scheduler\debug.log
  • For Mac OS: $USERPROFILE/.obm/log/Scheduler/debug.log

Information similar to the following will be displayed:

The following lines show the configuration profile being correctly synced from the backup servers:
[2011/08/02 09:53:04][info] Loading profile…
[2011/08/02 09:53:04][info] Loading configuration file …
[2011/08/02 09:53:04][info] Loading configuration file … Completed
[2011/08/02 09:53:04][info] Loading profile from server …
[2011/08/02 09:53:04][info] Loading profile from server … Completed

This means there is a backup scheduled to run on this computer:
[2011/08/02 09:48:48][info] [BackupSet (1310527911179)] Next backup will run in 0 hr 4 min 12 sec.

This line indicates there is a backup set configured to run on a different computer:
[2011/08/01 22:33:14][info] [BackupSet (1310527911179)] Ignore scheduled / server initiated backup on this computer, XXXXX. Should run on computer named ‘YYYYY’.

These three lines show a backup job being spawned by the scheduler:
[2011/08/02 09:53:20][info] [BackupSet (1310527911179)] Wake Up …
[2011/08/02 09:53:20][info] [BackupSet (1310527911179)] This backup job will run to its completion.
[2011/08/02 09:53:20][info] [BackupSet (1310527911179)] Start running backup

Important things to check in the scheduler log:

  1. Check the timestamps of the log entries – if the scheduler is working properly, there will be log entries at least every 5 minutes.
    If the last entry is older than 30 minutes, restart the”Online Backup Scheduler” system service and check the file again.
    Note that you will need to close and reopen the log file to see any new log entries.
Posted in File backup: Desktop, File backup: Server | Tagged , , | Leave a comment

Deleting an entire backup set from the offsite servers

Deleting the entire backup set

Note: this simply removes all data from the offsite servers WITHIN the backup set – it does not remove the backup set itself.

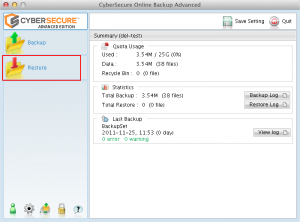
  1. Open CyberSecure advanced by using the system tray icon
  2. In the main console, click “Restore”
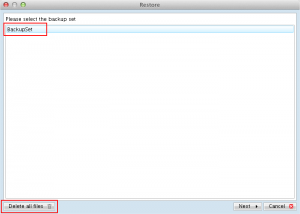
  3. Select the backup set to delete, then click “Delete all files”
  4. A confirmation screen will appear. Choose “Yes” when ready to proceed with the deletion
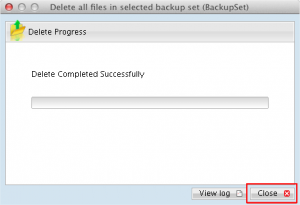
  5. Once all the files have been deleted, a success screen will be displayed
  6. All done – the available space will now be recalculated against the account. Click close and then close the CyberSecure software
  7. Note: the software may need to be closed + reopened for the free space to be properly recalculated
Posted in File backup: Server | Tagged , | Leave a comment

Deleting previous backup jobs

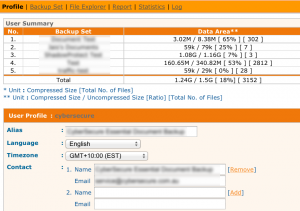
  1. Login to the CyberSecure web console with your login name and password
  2. If you have an advanced edition account, the main console screen will show the “Profile” summary
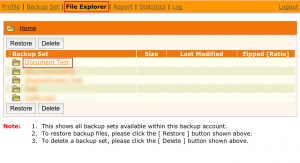
  3. Click into the “File explorer”, and select the backup set you wish to remove past jobs from.

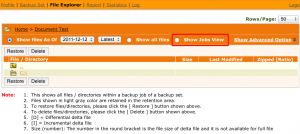
  4. Click “Show jobs view”
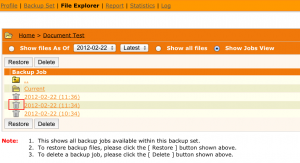
  5. Using the rubbish-bin icon, click the backup job to remove the changed files (ie. files that are in the retention area) from a past job from the server.
    Note: This will not remove files in the data area – to do that you will need to follow this guide.
Posted in File backup: Desktop, File backup: Server | Tagged , , | Leave a comment

Backup Interrupted by System Error {0}

Error

[Seed Load] Backup Interrupted by System Error “{0}”

Cause

The user account may have been set to “suspended” during the seeding process.

Resolution

Contact CyberSecure technical support and request the account be reactivated.

Posted in File backup: Server: general issues | Leave a comment