Windows
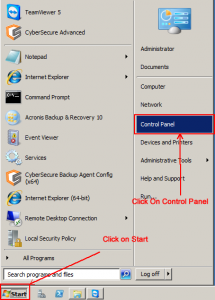
- Click on the “Start Menu” and click “Control Panel”
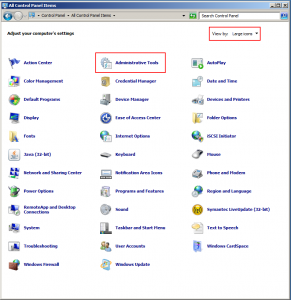
- Select “View : Large Icons” on the top right corner of the screen, if it is not already selected. From all the icons on the screen, select “Administrative Tools”.
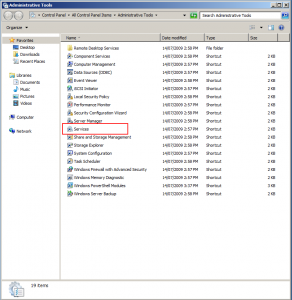
- From the tools list, select “Services”.
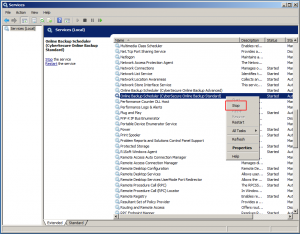
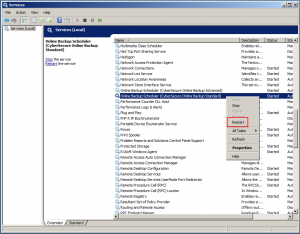
- From the service list, find the scheduler for your version of the software. For standard users, it will be “Online Backup Scheduler ( CyberSecure Online Backup Standard )” and for advanced users, it will be “Online Backup Scheduler ( CyberSecure Online Backup Advanced )”.
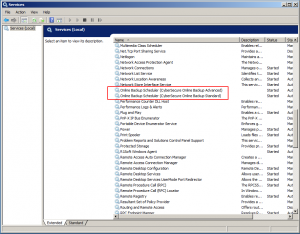
- To stop the scheduler, right click on the selected service and click “Stop” in the pop-up menu.
- To restart the scheduler, right click on the selected service and click “Restart” in the pop-up menu.
- And you are done.
Mac OS X
The following use the “sudo” command to execute with elevated privileges.
- Open “Terminal” (under Applications->Utilities)
- To find which user you are logged in under, type “whoami”.
- Then use the following commands to stop + start the scheduler service. The “sudo” command will prompt for your password – be sure to enter this correctly. It will not echo to the screen.
| Action | Command |
|---|---|
| Check if the scheduler is running | echo -n 'scheduler is ';pgrep -qfi obcs "cybersecure && obcs";if [ $? -ne 0 ];then echo -n 'not ' ;fi;echo running |
| To stop the scheduler | sudo pkill -fi obcs "cybersecure && obcs";sudo rm /Applications/CyberSecure\ Advanced/ipc/Scheduler/* |
| To start the scheduler | sudo /Applications/CyberSecure\ Advanced/bin/Scheduler.sh & |